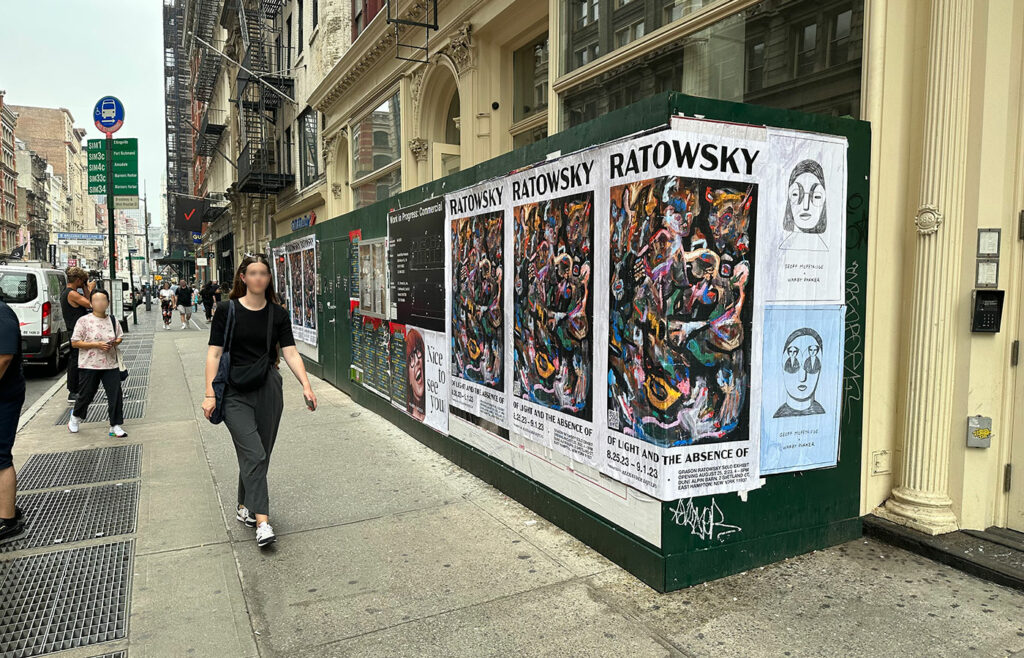
Wheat pasting, also known as paste-up or poster bombing, is a form of street art with a rich history dating back to 19th-century France and England. This method involves adhering a paper image to a wall or other surfaces using a homemade glue made from flour and water – wheat paste. Utilized for political statements, art installations, and advertising, wheat pasting is a versatile technique that allows art to break free from the confines of galleries and flourish in the public domain. If you’re a street artist, a DIY enthusiast, or a poster maker eager to dive into the world of wheat pasting, this comprehensive instructional guide is tailored for you.
Materials Needed
Before you begin your wheat pasting adventure, you’ll need to arm yourself with the right materials. Here’s a list of the essentials:
For the paste:
- All-purpose flour or wheat starch
- Water
- A medium-sized pot
- A whisk or a spoon for stirring
- A heat source, such as a stove
- A container for the paste
For the application:
- A large paintbrush or a roller
- A bucket or large container for the paste
- A scraper or squeegee
For the artwork or poster:
- Your poster design or artwork
- A printer
- Large sheets of paper
- A cutting mat
- A utility knife or scissors
For the pasting process:
- A ladder or step stool
- A tape measure
- A level
- Clothes you don’t mind getting dirty
- A friend to help handle large posters
With these tools and materials at the ready, you’re well-equipped to turn your artistic vision into a pasted reality.
Step 1: Preparation
Proper preparation is crucial to the success of your wheat pasting endeavor. Ensure you have the right location, a clean surface, and all the necessary tools before you mix the paste.
Selecting the Surface
Choose a location that allows your artwork to enjoy maximum exposure, ensuring it’s visible to both pedestrians and passing traffic but not so obstructive as to cause a safety hazard or violate any laws. Be aware of local ordinances regarding street art and get permission where necessary.
Cleaning the Surface
The surface must be clean and dry to ensure the wheat paste adheres properly. Use a mixture of water and mild detergent, and scrub any dirt, oil, or loose paint from the wall. Allow the surface to dry completely before pasting.
Gathering the Necessary Tools
Double-check that you have all the tools required for making the paste and applying the artwork. If possible, test your paste and application method on a small area to get a feel for the process and make adjustments as needed.
Step 2: Making the Wheat Paste
Wheat paste is the foundation of your wheat pasting project. It’s simple to make, but getting the consistency right is key to a successful application.
Mixing the Ingredients
In your medium-sized pot, mix one part flour with four parts water. If you prefer a smoother paste, start by mixing the flour and water in a separate container until smooth, then add the mixture to the pot. Heat the mixture on low to medium heat, stirring continuously to prevent lumps, until it reaches a gentle boil.
Achieving the Right Consistency
Once boiled, continue stirring and reduce the heat. The paste should thicken to the consistency of heavy cream. Be careful not to overcook, as this will result in a too-thick paste that’s difficult to apply. Test the paste by dipping in your roller or brush and observing the coating – it should be smooth and not leave any clumps.
Step 3: Preparing the Artwork or Poster
Your artwork is the star of the show, and it deserves proper attention before it’s pasted. Get your wheatpaste posters printed with us from our New York or Los Angeles facility. We can turn any design in to a work of art using our trademark ultra-thin 100lbs paper stocks (made from recycled paper!).

Printing or Creating the Artwork
Whether you’re designing on a computer or painting by hand, ensure your artwork is compelling and ready for public viewing. For printed designs, use high-quality ink and paper that can withstand the pasting process and environmental factors.
Trimming or Preparing the Poster
Cut your artwork into poster-size pieces or leave them as large sheets for murals. Use a cutting mat and straight edge to create clean, straight edges. If your design spans multiple pages, ensure they align precisely. If making a mural, you will paste sections at a time, ensuring each sets properly before moving onto the next.
Step 4: Applying the Wheat Paste
Applying the paste is a delicate and crucial step in the wheat pasting process. The goal is to spread the paste evenly without causing damage to the artwork or the pasted surface.
@lisstdr4 Me hubiera gustado tener un uniforme así en la secundaria. También hubiera estado cool utilizar un delineado fosforescente 👽 Ver niñas imponentes en la ciudad es algo que me habría gustado ver en esa etapa 🧃💌 #Dibujo #Creatividad #Ilustracion #Ilustrador #wheatpasteart #pasteup #illustration #animeart #kawaii #kawaiiart #spraypaint #commissionart #digitalartist #mangaartist ♬ maneater – favsoundds
Techniques for Applying the Paste
There are a few techniques for applying the paste. You can roll the paste onto the wall or use a paintbrush for more control. Use a squeegee or scraper to enforce even distribution. Work in sections, so the paste does not dry before you have a chance to apply the poster.
Tips for Smooth Application
To avoid wrinkles and air pockets, start from the center of the poster and smooth outward. Use your squeegee or scraper to work the paste out to the edges gently. Apply a thin, even layer of paste for the best results.
Step 5: Pasting the Artwork
With your paste ready and your surface prepared, it’s time to combine the two.
Placing the Poster on the Desired Surface
Carefully lay the poster, ensuring it doesn’t contact the wet paste until you’re ready. Take your time to avoid mistakes, as repositioning a poster once it’s pasted can be difficult and may result in a torn or wrinkled outcome.

Ensuring Proper Alignment
Have a friend help you align the poster accurately. Use a level or tape measure to ensure your artwork is straight and even. Once it’s in position, smooth out any wrinkles or air bubbles to fix the poster in place.
Step 6: Smoothing and Sealing
The art of wheat pasting doesn’t stop with sticking; you want your piece to look professional and withstand the elements.
@strange_gye En este caso el pedazo roto no se maltrató mucho y al final quedó poco visible que se había arrancado. #streetart #pasteup #pasteupart #pasteupguayaquil #pasteupecuador #ecuador🇪🇨 #ec #ilustradoresecuatorianos #fyp #foryou #parati #encebollado #strangeilustra ♬ Brutus (Instrumental) – The Buttress
Removing Air Bubbles
Immediately after pasting, work from the center outwards to smooth the artwork and remove any air bubbles. Use the scraper gently to avoid tearing the poster.
Securing the Edges
Water and weather can penetrate the edges, causing your artwork to peel away. Secure the corners and edges by applying an extra layer of paste or folding the excess over onto the back of the poster.
Step 7: Drying and Finishing
Your poster is in place, but the work isn’t done yet. Now it’s time for the drying and finishing touches to protect your creation.
Allowing Sufficient Drying Time
Let your pasted artwork dry fully before it’s exposed to the elements – this typically takes 24 to 48 hours. A dehumidifier or a fan can speed up the process, but be sure the dry air won’t cause the paste to crack.
Protecting the Artwork from Weather
If you expect your poster to face heavy weather, consider applying a clear, weatherproof sealant over the top. This helps protect your artwork from rain, sun, and wind, ensuring it stays vibrant and visible for as long as possible. Be sure to test the sealant on a small area of your poster first to ensure it doesn’t cause any discoloration or damage. If you notice any air bubbles forming under your poster, simply use a ruler or squeegee to gently push them out towards the edges. This will help ensure a smooth and even surface for your poster.
Cleaning Up Excess Paste
Once your artwork is completely dry, you may notice some excess paste around the edges. Use a damp cloth or sponge to carefully wipe away any residue. Do not scrub too hard, as this can remove some of the ink from your poster.